Create a custom spot colour to tell the printer which part of your design to print in White Ink or Spot UV (Clear Ink). Spot colours can be created and assigned to your artwork using programs such as Adobe Illustrator, InDesign and Photoshop.
Here’s how it’s done…
Creating a Spot Colour Swatch in Illustrator / InDesign

Creating and applying Spot Colour Swatches to vector artwork can be done in a few simple steps shown below. If you are unsure what a Vector is or how to create one, click here for a guide to Vectors.
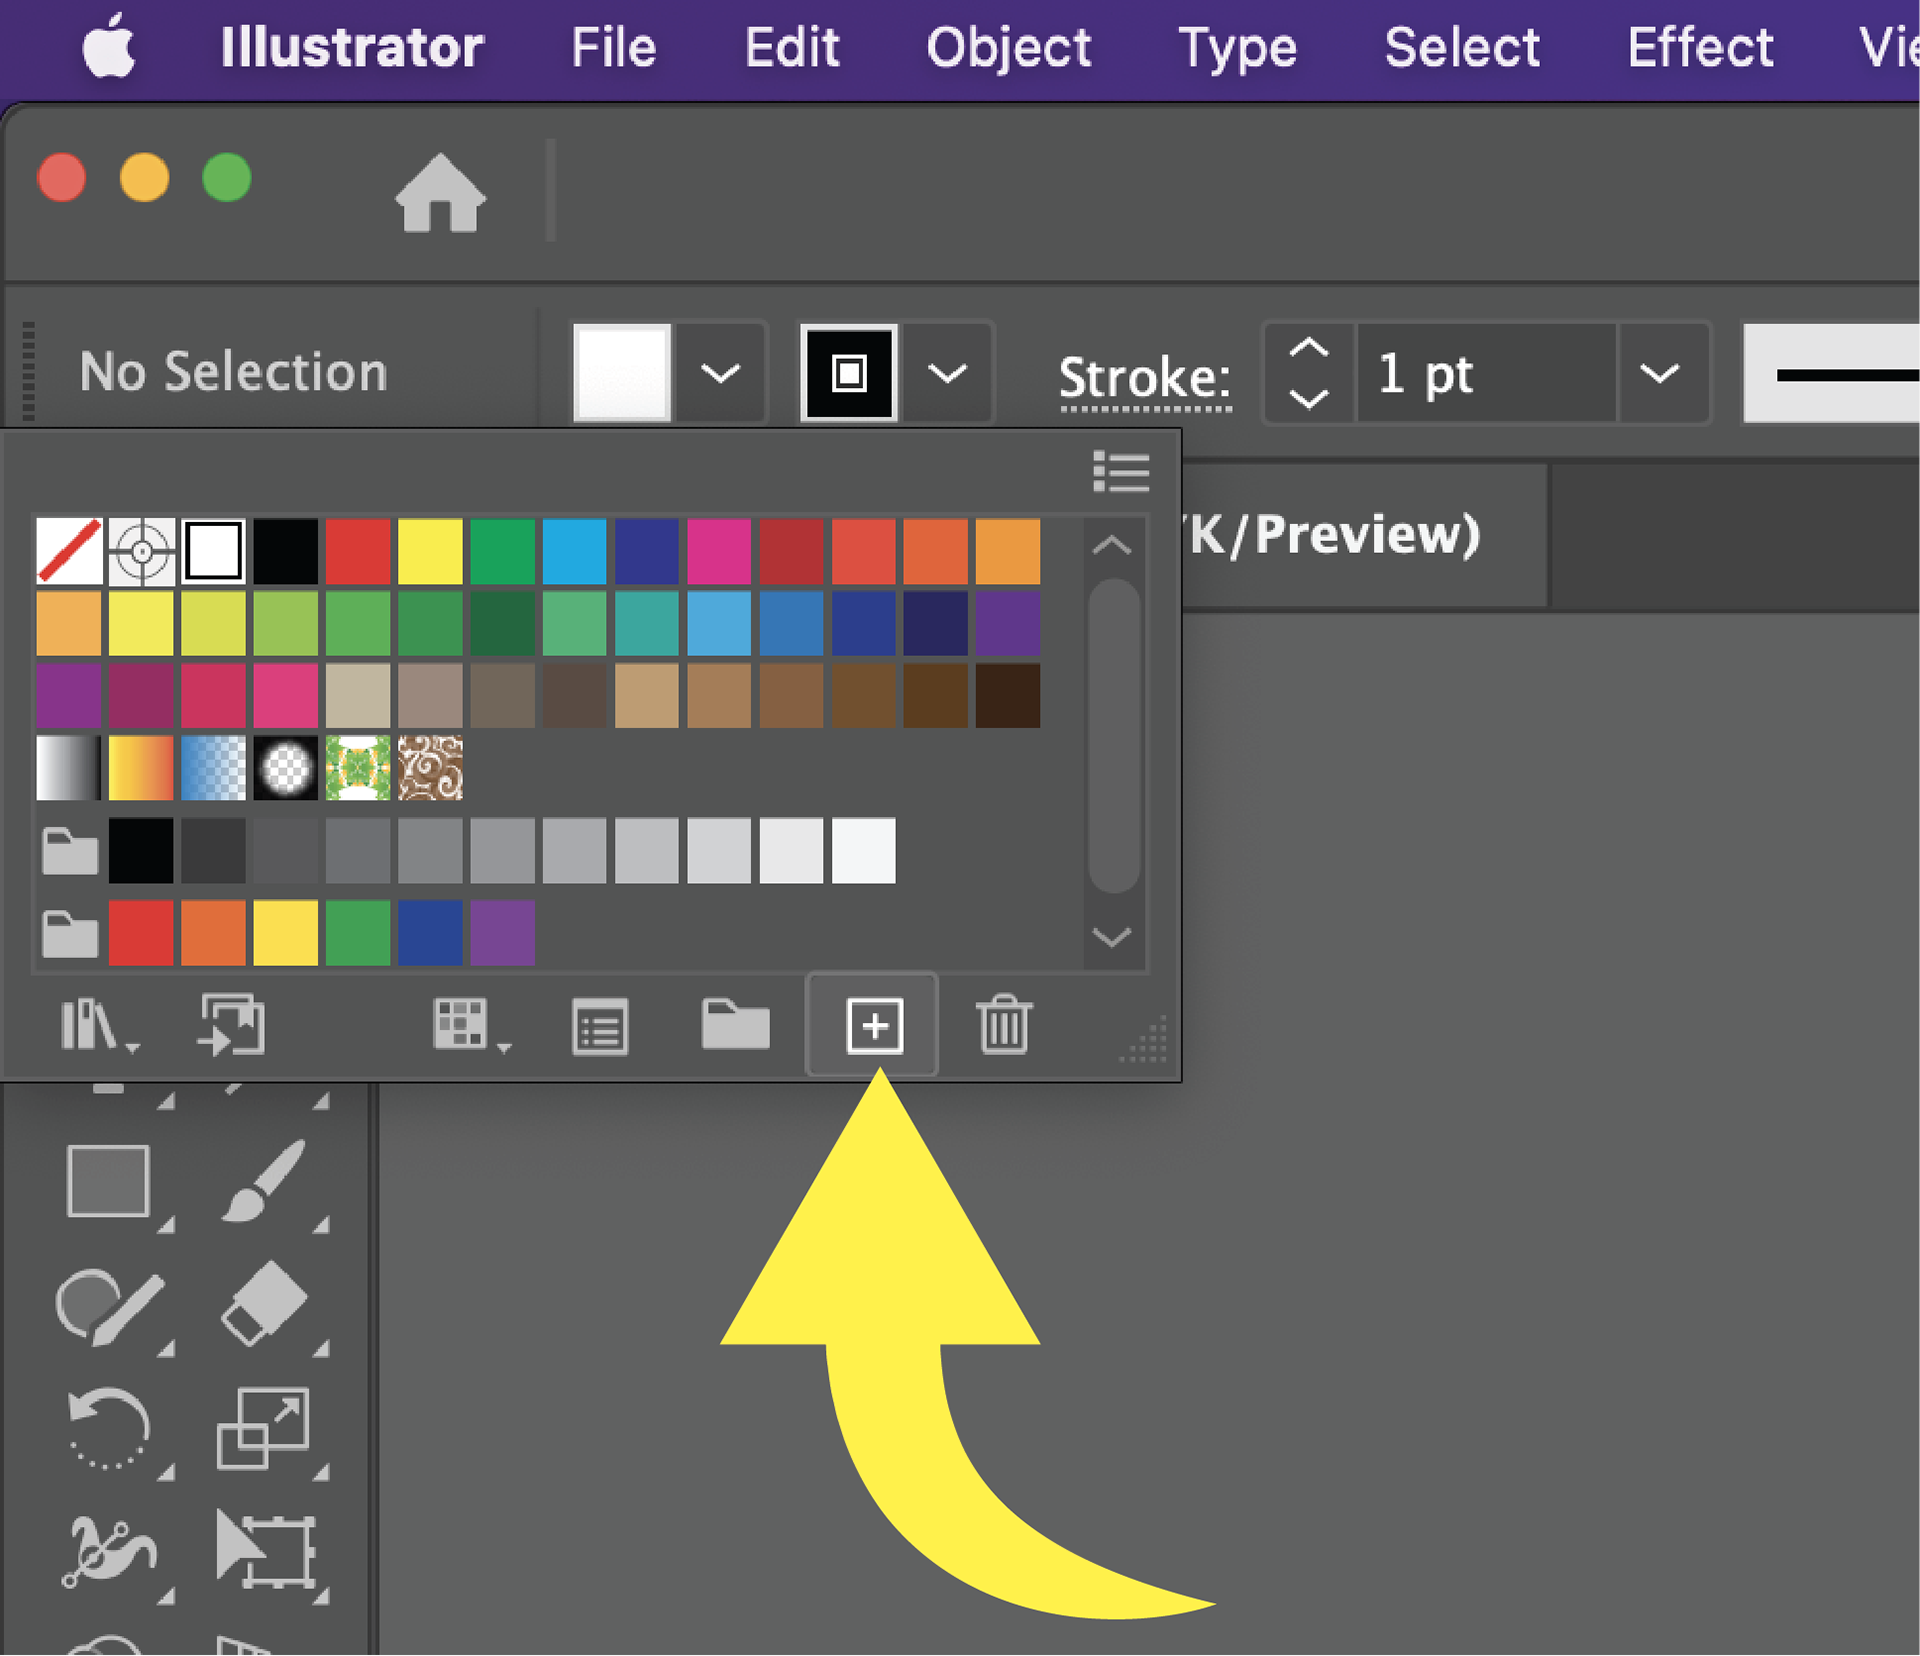
Step 1
Create a 'new swatch' in the Swatches Panel by clicking on the + icon
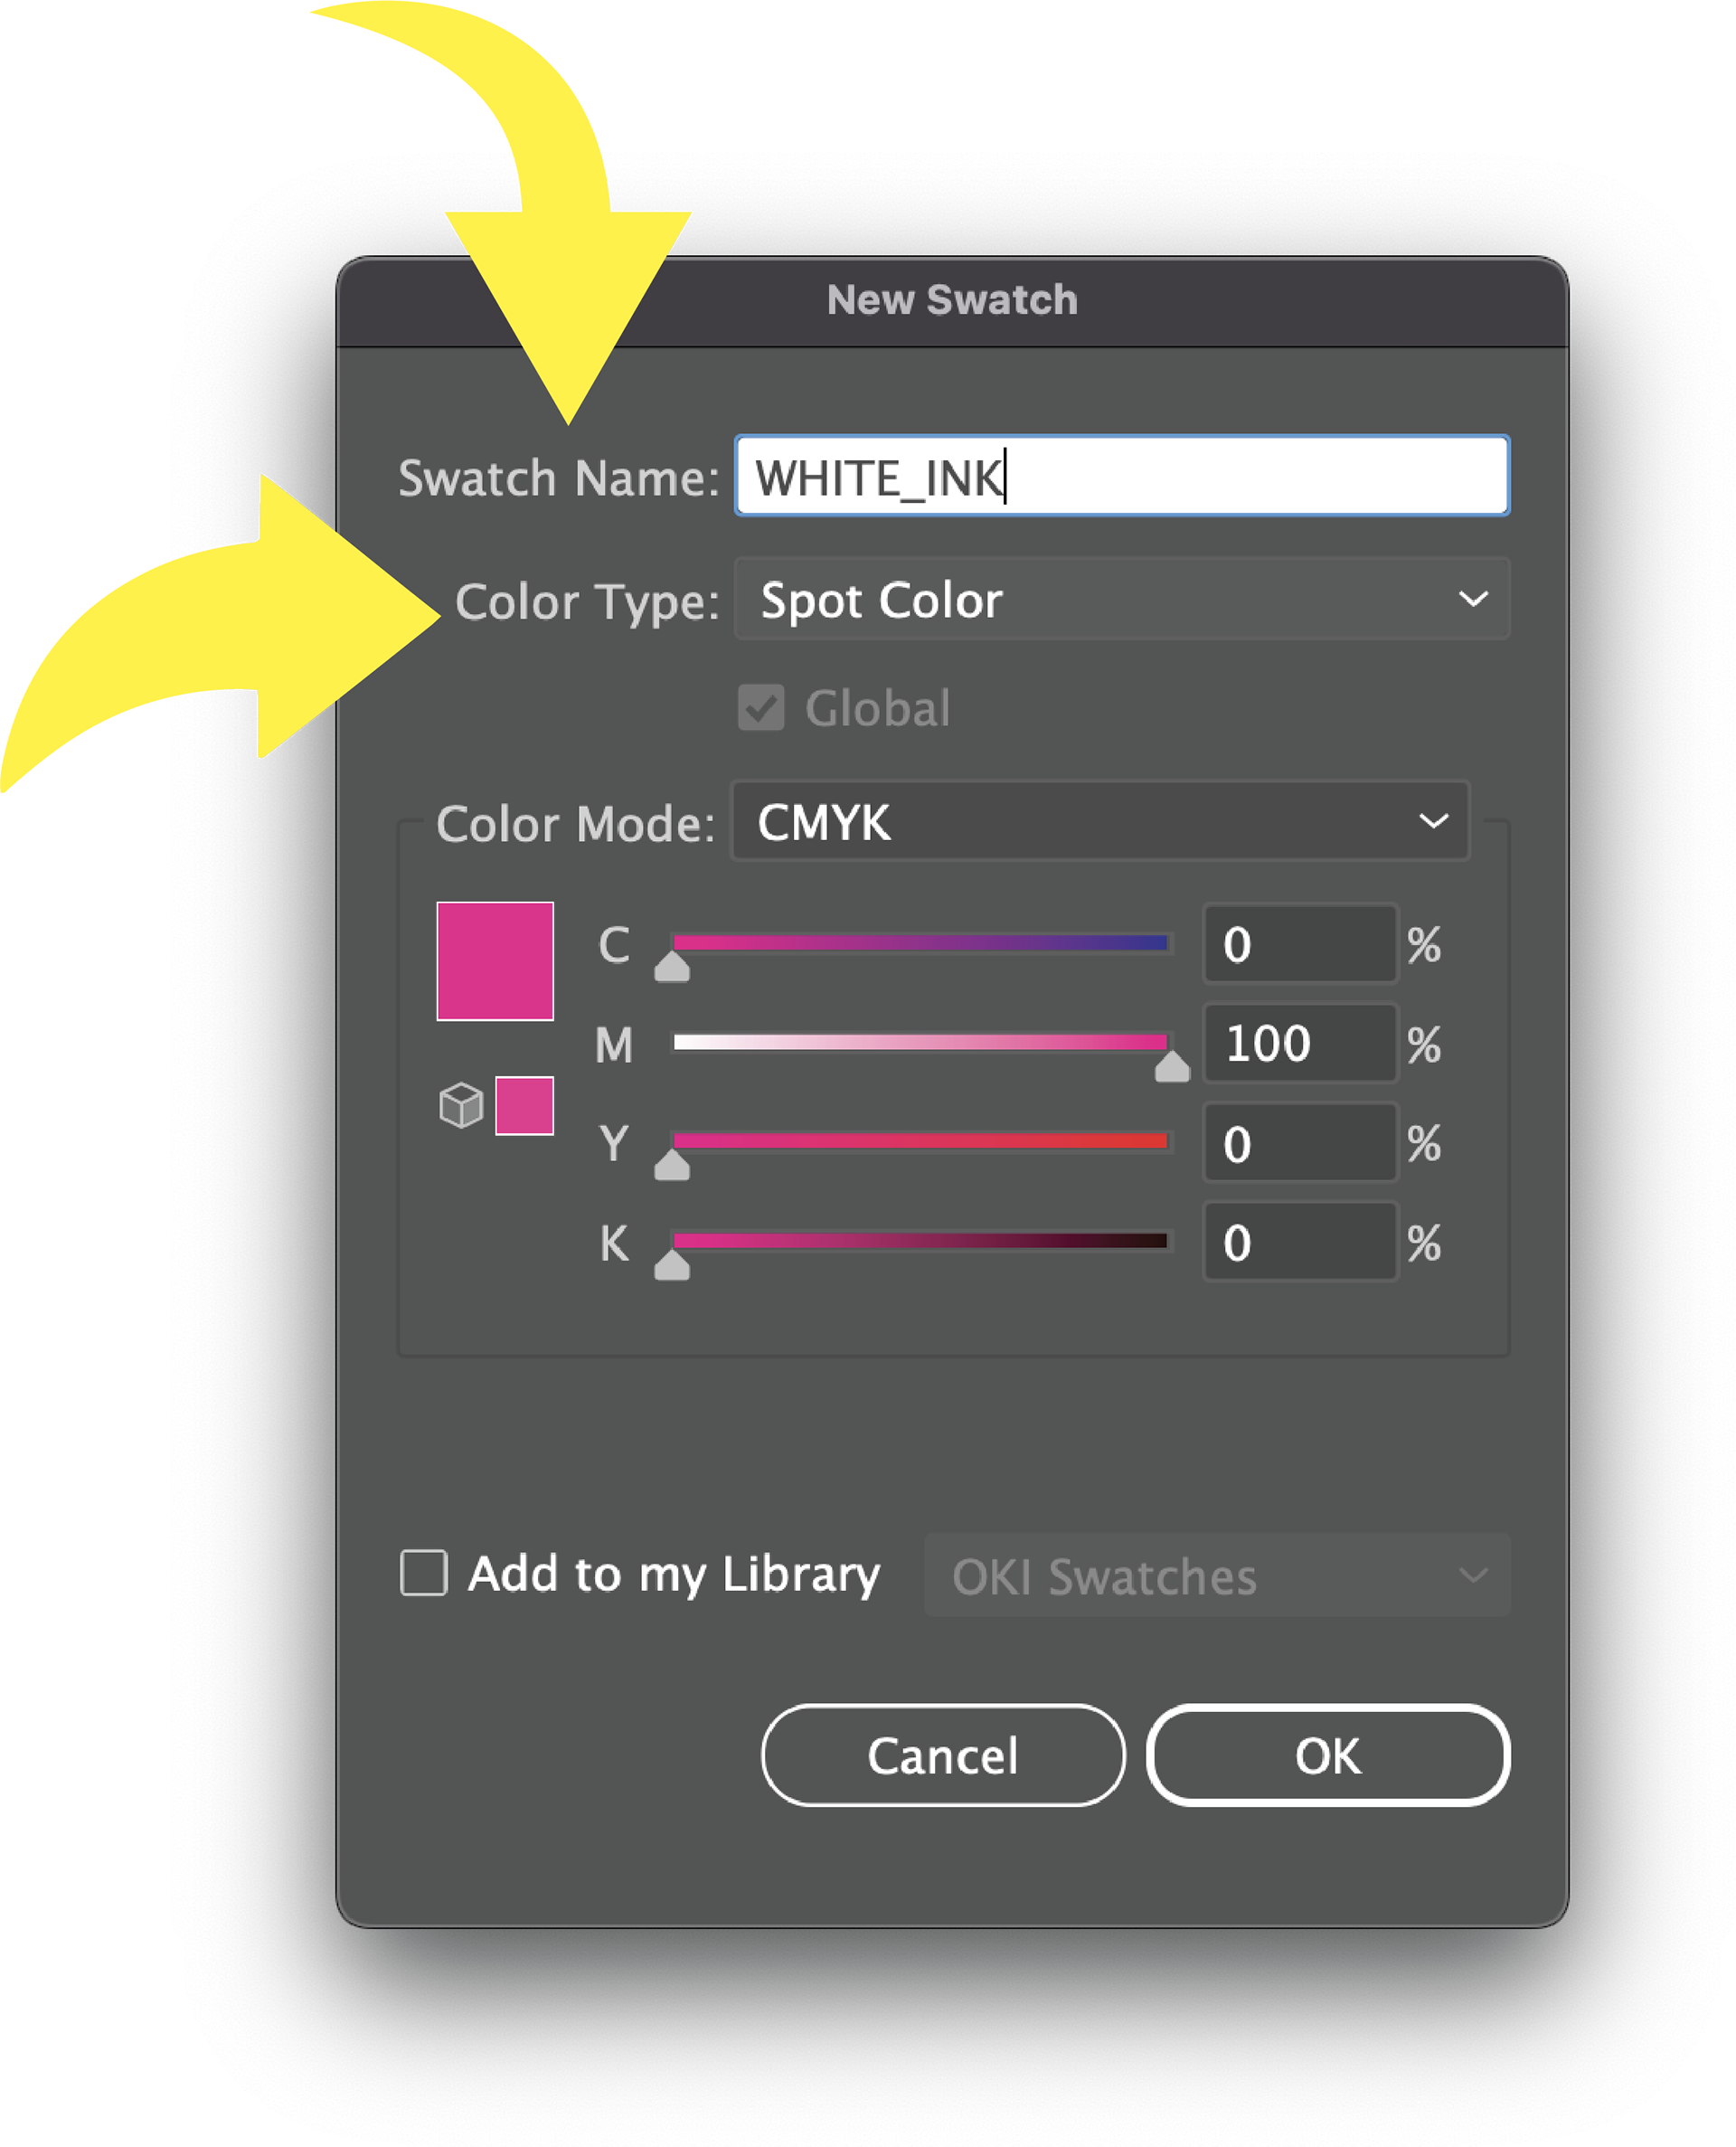
Step 2
Name your Swatch WHITE_INK or (CLEAR_INK for clear)
DON'T FORGET THE UNDERSCORE.... "WHITE_INK"
Change the colour type from Process Colour to 'Spot Colour'
The actual colour values do not matter. Pink is often used to clearly see which parts of the artwork will be printed white. Make sure it’s CMYK
Step 3
Apply the swatch to the respective artwork and then save your file as a .PDF

While making your own swatches is good practice and a relatively simple process, if needed the swatches can be downloaded from by clicking on the button below.

Creating a Spot Colour Swatch in Photoshop
Adding a White or Clear Spot Colour to images other than Vectors (for example JPEGs) is done by creating a ‘Spot Channel’ from selected parts of your artwork. Anything on this White Ink Spot Channel will be recognised by the printer and printed white.
Step 1
Select the area of your artwork you want to be printed in White Ink (or Clear Ink). You can do this a number of ways including the 'Magic Wand' tool or ‘Select Colour Range’ found in ‘Selection’ in the Top Menu Bar.
Step 2
Once selected, go to the ‘Channels’ window and choose ‘New Spot Channel’ from the small hamburger menu. A new Channel will be created for the selected parts of your artwork.
Name this Channel WHITE_INK (or) CLEAR_INK
Please note you can choose any colour for this Channel (I use a bright pink so I can clearly see which parts will be printed White
Step 3
Delete any other channels, leaving only the WHITE_INK channel (or CLEAR_INK) Spot Channel you just created.
Finally
Save your artwork correctly. Click ‘File’ and then ‘Save as copy’
The file should be Photoshop (.PSD) and make sure ‘Spot Colour’ is ticked
The file should be Photoshop (.PSD) and make sure ‘Spot Colour’ is ticked

Tips
The White/Clear Printer can handle stock from 60gsm up to 350gsm
•
Max Paper size is SRA3 (450mm X 320mm)
•
Allow for 5mm margins (Top, Bottom, Left, Right)

Upload your file for printing
Once your file is ready, you can use the button below to access printing service guide and dropbox.